Showing posts with label AngularJS. Show all posts
Thursday, January 19, 2017

My favorite Visual Studio code extension for Angular 2 Development

TL;DR;

I have been using Visual Studio Code for quite a good amount time and I am loving it as a code editor. Recently I have started using it as my development editor for Angular 2 as it has recommended by the Angular 2 development team also. There are quite a few good extensions available in market place for the same. In this blog post, we are going to talk about my favorite extensions of Visual Studio Code for Angular 2 development.

My favorite extensions for Visual Studio Code for Angular 2 development:

Here is list of my favorite extension of Angular 2 Development.

Angular 2 TypeScript Snippets by John Papa:
When It’s come to Angular 2 development how we can forget John Papa. There is also a snippets extension created by him. You can find that at the following location.

https://marketplace.visualstudio.com/items?itemName=johnpapa.Angular2
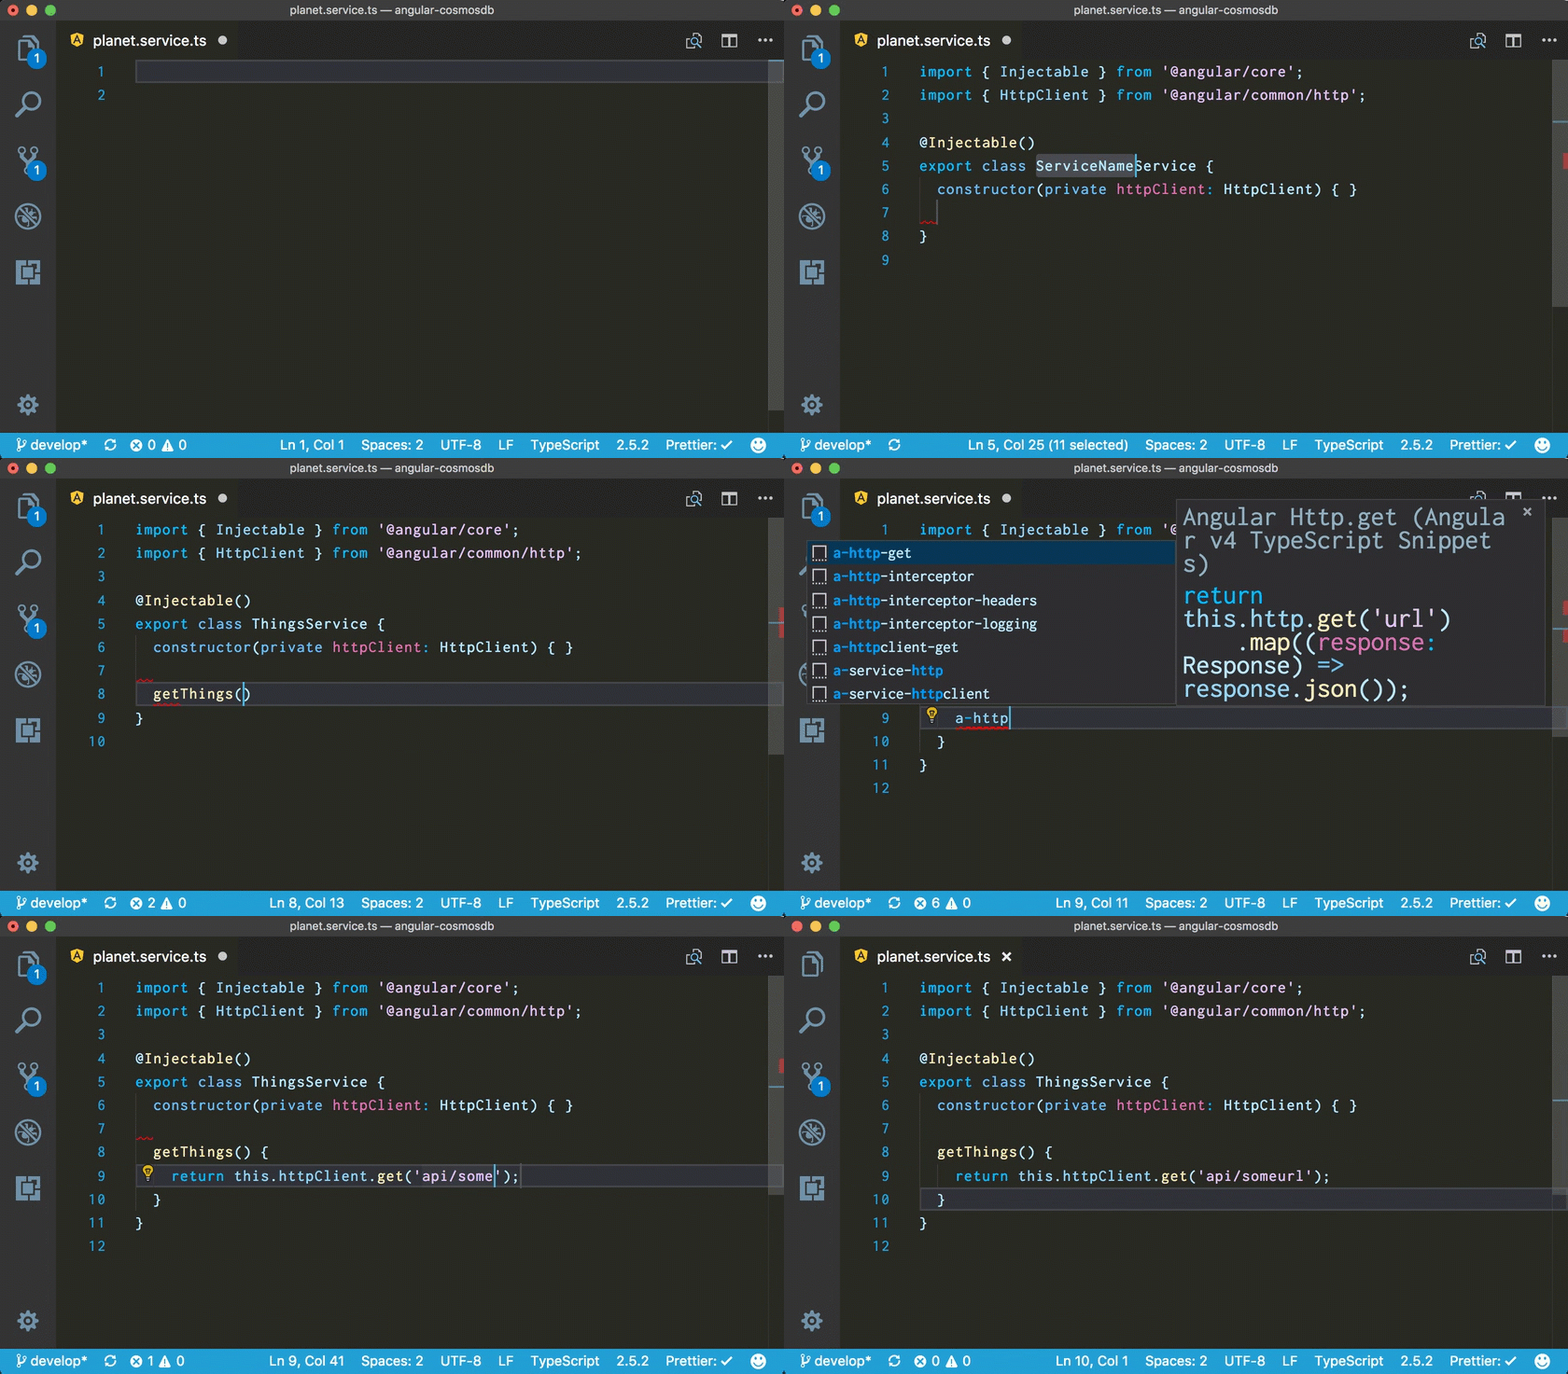


There are plenty of snippets available from where you can create boilerplate code for Angular 2 like for example, You can create Angular 2 Component with ng2-component.

Angular VS Code TypeScript and HTML Snippets by Dah Wahlin:
This is also a code snippets extensions but here you get lot many code snippets available. You can find more about that extension at the following link.

https://marketplace.visualstudio.com/items?itemName=danwahlin.angular2-snippets

With this extension, you will get TypeScript extension as well as some of HTML snippets for binding of Angular 2  as well as some of the ngform and other snippets.

angular2-snippet for dahwahlin


Path Intellisense from Christian Kohler:
It is the plugin that autocompletes the path and provides Intellisense for the paths and it is a great extension and comes quite handy when you put different JavaScript and CSS files. You can find more about it at the following location.

https://marketplace.visualstudio.com/items?itemName=christian-kohler.path-intellisense


Auto Import by Steoates:
It is an auto import extension for everything. It finds, parses and provide code actions and code completion for all available imports. It works great with TypeScript and even for TSX  which used for react.js with TypeScript. You can find more information about that extension at the following link.

https://marketplace.visualstudio.com/items?itemName=steoates.autoimport


It helps so much when you want to import services and other files into components with Angular2. This is my most favorite extension for Angular 2 Development.

HTML CSS Class Completion by Zingd:
It is a great extension for applying CSS class name for HTML class attribute based on your CSS files available in the project. You can find more about that on the following location.

https://marketplace.visualstudio.com/items?itemName=Zignd.html-css-class-completion


That’s it. This all extensions are my favorite extension for Angular2.What are your favorite extensions that make your life easy? Please put your favorites in this blog post comments. Hope you like it. Stay tuned for more!!
Share:
Thursday, July 14, 2016

Angular 2 packages for sublime text 3

Recently, I have written a blog post about Angular 1.5 Packages for the sublime text 3. It was a great hit and lots of people were asking for packages for the Angular 2. So I thought it would be a good idea to write a blog post about it. So let’s get started. We have already learned that how we are going to install packages on the sublime text 3. So Followings are packages that are good for angular 2.

As we all know that Angular2 is built with TypeScript and So first thing we need is a Typescript package.

Typescript:

This plugin is developed by Microsoft it self. You can find more information at their Github Repository.

https://github.com/Microsoft/TypeScript-Sublime-Plugin

There are code editing services provided by this package. You can do lots many things with the package like Rename, Format document i.e where different shortcuts are already defined in the GitHub repository. This package is a must for Angular 2 development.

typescript-package-for-sublime-text

Angular 2 snippets:

This package provides code completion and snippets for the angular 2. It has been imported from John Papa’s code completion for visual studio code.

https://github.com/pjlamb12/st3-ng2-snippets

It provides various snippets and code completion for Angular 2.

angular2-component-sublime-text

Once you type ng2 it will have snippets for various things in Angular 2.

angular-2-snippets-demo-for-sublime-text

That’s it. Hope you like it. Stay tuned for more!.
Share:
Wednesday, July 6, 2016

Angular 1.5 packages for Sublime Text 3

One of my friends was using Sublime text 3 as  editor for the Angular.js application but he was using it without packages so he has to do manually all the things. I suggested him few packages and now he is much more productive than ever. So in the blog post, I’m going to share few tips and packages working with Sublime text.

Installing package on Sublime Text 3:

Sublime Text 3 support packages that make Sublime Text 3 a great choice for any kind of Web Development project. This makes developer’s life easy and developers will be much more productive than ever. Sublime Test does not come with inbuilt package manager but there is a third party package manager called “Package Control”. You can find more information about that on the following location.

 https://packagecontrol.io/

There is instruction provided for installation at the following link.

https://packagecontrol.io/installation

Angular.js 1.5 packages for Sublime text:

JS Hint:
If you have ever work with JavaScript you should be knowing about linter for JavaScript. JS Hint is a JavaScript linter which will look your code and verify that it has proper styling, proper syntax, and error related to JavaScript best practices.

To make sure that this plugin works correctly. You need to install JS Hint installed globally via npm:
npm install -g jshint
Then type Ctrl+ Shift + P and select install package.

package-control-sub-lime-text3

Once you click on Install it will load the extension from the repository and you can install the extension you choose.

image

AngularJS:
This package is developed by Angular UI Team. It contains lots of functionality like
  • Code completion for Inbuilt angular libraries.
  • Angular-Related Snippets.
  • Directive completion of Custom Defined Directives
To Take advantage of this plugin’s syntax highlighting You need to change the view type of your HTML page file View-> Syntax-> HTML(Angular.js).

angular-html-package

And then you can code completion like following.


code-completion-angular-js

JSFormat:
This package helps you format your Javascript and JSON. It is based on JS Beautifier. It highly configurable and you can also define your preferences. There are plenty of options available you can see that on the following link.

https://github.com/beautify-web/js-beautify#options

John Papa’s Angular Snippets for Sublime Text:
John Papa has created great snippets for Angular.js and it’s very useful. He has written a nice blog post about how to install it with Sublime Text. You can refer that from the following link and refer that.

https://johnpapa.net/angularjs-snippets-for-sublime-visual-studio-and-webstorm/

After installing that you can create lots of angular boilerplate code very easily. For example, If you want to create an angular controller just type ngcontroller.

ng-controller-sub-lime-text

Once press tab it will create an angular controller like below. It will also follow best practices written in John Papa’s style guide also.

controller-created-sublime-text

That’s it. Now you should be much more productive with angular and sublime text editor. Hope you like it. Stay tuned for more!!.
Share:
Sunday, October 18, 2015

Three way to activate state in UI-Router Angular.js

Before some time I have written a blog post about routing - Routing with UI-Router and Angular.js I have got few questions from my reader in email. One of question is to how we can activate state of UI-Router as UI-Router works with state instead of URLs. In this blog post we are going to explain, different ways to activate state in UI-Router.

There are three ways of activating state in UI-Router.

  1. Call $State.go
  2. UI-sref directive as link
  3. Navigate to URL associated with State
We are going to learn about this three ways in details.

Call $State.Go:


It is a one of convenient method of changing state, Returns a promise representing the state of transition. It calls underlying $State.Transition method internally but automatically sets option location: true , inheritance:true, relative: $state.$current and notify:true. This allows you to set easily update parameters with passing arguments. You can find more information about that at following location.

https://github.com/angular-ui/ui-router/wiki/Quick-Reference#stategoto--toparams--options

UI-sref directive as link:


We have used this method already in previous example. It is a directive that bind a link to state. If the state has an associated URL, the directive automatically generate and update the href attribute via $State.href() method. Clicking on link will trigger a state transition with parameters.
You can use it in following way.
  • ui-sref='stateName' - Navigate to state, no params. 'stateName' can be any valid absolute or relative state, following the same syntax rules as $state.go()
  • ui-sref='stateName({param: value, param: value})' - Navigate to state, with params.
You an find more information about this at following location.

https://github.com/angular-ui/ui-router/wiki/Quick-Reference#ui-sref

Navigate to the URL associated with State:


As we have seen in previous blog post, most of the state will have URL associated with it. Now when user access the index.html/contactus, it will activate contactus state and load the template associated with this state. You can also pass the parameters with that. Following is documentation for the same.

https://github.com/angular-ui/ui-router/wiki/Quick-Reference#ui-sref

Hope you like it, Stay tuned for more!!.
Share:
Saturday, October 3, 2015

Routing with UI-Router and Angular.js

In Today's world, Angular.js is one of best JavaScript framework available to create Single page applications. It's provides some great features and with the help of this features we can built great interactive apps. In any single page application routing is very important as in most of the time single page application will not have full post backs. So routing will be very important to give feel like normal page application and sometimes proper routing will increase search engine ranking also.

So in this blog post we are going to learn how we can create routes in Angular.js application with help of UI-Router.

What is UI-Router:


UI-Router is a routing frame work created Angular.js team and its not a part of Angular.js But it built on top of Angular.js. You can say it's a 3rd-Party module and is very powerful. It support most of things that we can do with ng-route and also do many other stuff that is not possible with ng-route.
You can find more information about UI-Router at following link.

https://github.com/angular-ui/ui-router
http://angular-ui.github.io/ui-router/site/#/api/ui.router

Here are few features that is provided by UI-Router.
  1. UI-Router allows nested views and multiple views
  2. It allows you to strong type linking between state based on state names.
  3. State allows you to map and access different information about different states and you can easily pass information between states via $Stateparams parameter.
  4. With states approach your views are not tied to the URL and it is tied to states. Which can be very useful in large applications as you can change UI part without changing URLs.
  5. You can also change Partial UI of application which is not possible with ng-route.

So what are we waiting for let's create a sample application with UI-Router and Angular.js.

Sample application with UI-Router:


I'm going to use visual studio for creating this sample application. So that we can use IIS local express to host this application. I'm going to create asp.net web application.

angular-Ui-route-demo-project

We are going to use empty asp.net web forms application as we are not going to use asp.net code here it's a simple HTML page application to demonstrate the power of UI-Router.

empty-web-application-angular-ui-route-demo
We are going to create sample application with 3 pages.
  1. Home
  2. About Us
  3. Contact Us

So for that we need three html pages which will acts as partial views just like ASP.NET MVC partial views or user control in ASP.NET Web Forms.
I'm going to create a very basic HTML pages with following code.
home.html page code:
<h1>Home</h1>
About Us HTML page code:
<h1>About us page</h1>
Contact Us HTML page code:
<h1>contact us </h1>
And now we are going create index.html and following is a code for that.
<!DOCTYPE html>
<html lang="en" xmlns="http://www.w3.org/1999/xhtml">
<head>
    <meta charset="utf-8" />
    <title>Angular UI Router Demo</title>
    <script src="https://cdnjs.cloudflare.com/ajax/libs/angular.js/1.4.6/angular.min.js" type="text/javascript"></script>
    <script src="https://cdnjs.cloudflare.com/ajax/libs/angular-ui-router/0.2.15/angular-ui-router.min.js"></script>
    <script src="app.js"></script>
</head>
<body ng-app="routerDemoApp">
    <ul >
        <li><a ui-sref="home">Home</a></li>
        <li><a ui-sref="aboutus">About us</a></li>
        <li><a ui-sref="contactus">Contact us</a></li>
    </ul>
<div>
    Angualr UI Router Demo
</div>
<div>
    <div ui-view></div>
</div>
</body>
</html>
If you see above code you can see I have added angular.js and angular-ui-router-min.js JavaScript files from the cloud flare CDN and then I have created a ng-app "routerDemoApp" with body tag of html page. I have used UL and Li ta and UI-Sref to create link for our routes. Here also notice ui-view tag in one of div where html pages will be rendered in this div.

So now basic infrastructure is ready now its time to create JavaScript code for our application. So lets create app.js file and write code like following.
// JavaScript source code
var routerDemoApp = angular.module('routerDemoApp', ['ui.router']);

routerDemoApp.config(function ($stateProvider, $urlRouterProvider) {

    $urlRouterProvider.otherwise("/home");

    $stateProvider
        .state('home', {
            url: '/home',
            templateUrl: 'home.html'
        })
        .state('aboutus', {
            url: '/aboutus',
            templateUrl: 'aboutus.html'
        })
        .state('contactus', {
            url: '/contactus',
            templateUrl: 'contactus.html'
        });

});
So if you see above code carefully, Here I have created a angular app module called routerDemoApp and I have injected dependency of UI-Router. Then in config function we have created different states for Home, About Us and Contact Us. You can see I have passed two parameter url and template url for each state with respective html pages. Also I have written otherwise function which will return home state by default.

Now let's run this application in browser.

demo-application-browser-ui-router-angularjs

So by default Home page is loaded as you can see and in URL also you have /home now when you click on About us it will load about us page like following.

about-us-demo-page-in-browser-ui-angular-js

So it's very easy to create routing with Angular UI-Router in future post we will see how we can use nested view and multiple view.
You can find complete source code of this application at github on- https://github.com/dotnetjalps/AngularUIRouter
Hope you like it. Stay tuned for more!.
Share:

Support this blog-Buy me a coffee

Buy me a coffeeBuy me a coffee
Search This Blog
Subscribe to my blog


My Mvp Profile
Follow us on facebook
Blog Archive
Total Pageviews