I have been using dependency injection a lot in my projects. As it’s provide great flexibility to wire up things. Recently in free time I have been looking into some of open source architecture like Orchard and Nopcommerce. Both are using Autofac as dependency injector. As this IOC container are used in one of top successful project I got interested in Autofac and I started learning Autofac. I thought it will be a good idea to start a blog series for my learning so other can get benefit of it.

After creating application, I have created a my interface IPrintService as following.
Here is the implementation of interface in class like following.
Now, We have done with basic stuff so it’s time to wire up component with Autofac. To add references for Autofac I’m going to use following nuget package.

After adding a Autofac reference via nuget package. I have written following code for that sample console application.
Here in the above code, If you see carefully. First I have created a object of Container Builder and then I have register type with print service. Then I have build container builder to get container object. After that I have resolved print service with container and get the object of printer service. Then I have printed Hello world with PrintSomeThing method. When you run application. Here is the output as expected.
That’s it. You can see how easily we can wire up things with Autofac. In future posts we will see some advance features of Autofac. Stay tuned for more!!.
What is Autofac?
As per Autofac.org a site for AutofacAutofac is an addictive Inversion of Control container for .NET 4.5, Silverlight 5, Windows Store apps, and Windows Phone 8 apps.It is used in lots of application and one of the most popular IOC container in .NET world. As per official documentation here is the basic pattern for integrating Autofac in your application.
- Structure you application with Inversion of Control in mind
- Add Autofac references( I prefer it using Nuget Package).
- At application startup create a container builder
- Register a component
- Build container and store it for a later use.
- Create lifetime scope of container during application execution.
- Use lifetime scope to resolve instances of application.
Autofac Example:
So what we are waiting for, Let’s create a simple example. I’m going to create a sample application like following.
After creating application, I have created a my interface IPrintService as following.
namespace AutoFacBasic
{
    public interface IPrintService
    {
        void PrintSomething(string text);
    }
}
Here is the implementation of interface in class like following.
using System;

namespace AutoFacBasic
{
    public class PrintService : IPrintService
    {
        public void PrintSomething(string text)
        {
            Console.WriteLine(text);
        }
    }
}
Now, We have done with basic stuff so it’s time to wire up component with Autofac. To add references for Autofac I’m going to use following nuget package.

After adding a Autofac reference via nuget package. I have written following code for that sample console application.
using Autofac;
using System;

namespace AutoFacBasic
{
    class Program
    {
        static void Main(string[] args)
        {
            //registering interface with class that implemented
            var builder = new ContainerBuilder();
            builder.RegisterType<PrintService>().As<IPrintService>();

            //Resolving inteface with autofac
            var container = builder.Build();
            var printService = container.Resolve<IPrintService>();
            printService.PrintSomething("Hello World");
            Console.ReadKey();
        }

    }
}
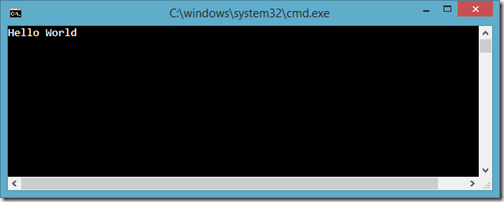
Here in the above code, If you see carefully. First I have created a object of Container Builder and then I have register type with print service. Then I have build container builder to get container object. After that I have resolved print service with container and get the object of printer service. Then I have printed Hello world with PrintSomeThing method. When you run application. Here is the output as expected.

That’s it. You can see how easily we can wire up things with Autofac. In future posts we will see some advance features of Autofac. Stay tuned for more!!.
You can find complete source code of this application at following location at github- https://github.com/dotnetjalps/AutofacSamples/